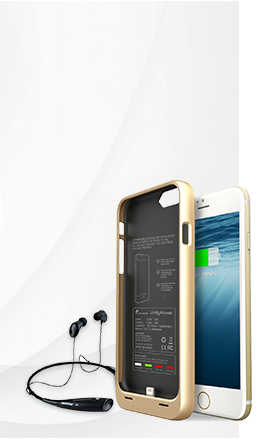
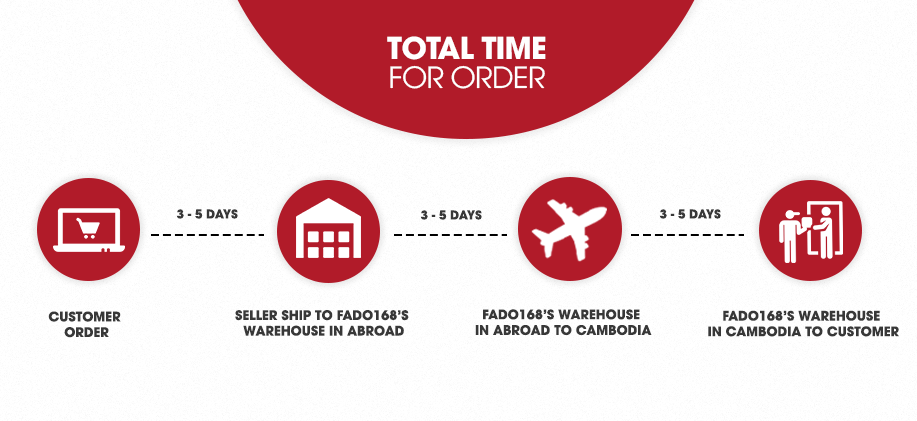
Pink and Brown Premium Pre-Inked Mapping String [2 X 130 Ft Bottles, 80m total] and White Waterproof Eyebrow Mapping Pencils for Lips & Eyebrow for Permanent Makeup, Microblading and Henna Procedures
GREAT SIZE: Each roll has 130ft (40m) of pre-marked mapping thread, positioned inside a sealed metal stylish bottle. A built-in cutter lets you get the correct string length quickly and easily.
TOP QUALITY: Soaked in Allergen-Free Ink to leave thin but Well Seen Marks on the Skin. One Thread Can Leave a Mark for up to 10 Lines!
PEEL-OFF PENCIL INCLUDED: Soft mapping pencil is needed to complete the sketch lines. This pencil is designed to be applied before anesthesia. Draw the main lines with a pencil so that the eyebrows or lips are with smooth sketch lines. Use ink permanent pencils before you start highlighting the sketch with Brow Paste. Ink Permanent Brow Paste is recommended.
GREAT FOR PERMANENT MAKEUP PROCEDURES: Take your PMU henna and tattoo practices to the next level with our superior white pre-inked eyebrow string designed for precision and fast, error-free line graphing! Never waste time with inferior, subpar products that don’t work.
NEW AND IMPROVED MICROBLADING STRING: our new and improved pre-inked microblading string is now heavily pigmented on the ultra-fine thread so you can work quickly and effectively in less time.
Product Specifications
Package Dimensions: 8.11 x 5.83 x 0.79 inches; 3.84 ounces
Item Weight: 3.84 ounces
Manufacturer: Ink Permanent
ASIN: B0BJ82Z92F
Customer Reviews: 4.2 out of 5 stars 203Reviews
Best Sellers Rank: #177,124 in Beauty & Personal Care (See Top 100 in Beauty & Personal Care) #1,578 in Eyebrow Color
Product Information
Product description
The correct sequence of drawing an eyebrow sketch
Make sure there is no makeup on the skin, or remove it if there is.
Degrease the skin.
Using a brush, lay the brow hair so that there is no distortion of the brow shape.
At the beginning of the process:
Please take out the string and cut it with a special blade.
Divide the face with a line in the center, start marking from the central corner of the lips, and draw over the line between the eyebrows a little more than the middle of the forehead.
Define the beginning lines of the eyebrows parallel to the centerline at the same distance. The bottom of such a line starts from the wing of the nose. Most importantly, ensure that the distance between the stripes of the beginning of the eyebrow is the same as the centerline.
To mark the end of the eyebrow, you need to draw a line from the wing of the nose to the outer corner of the eye.
To determine the height of the eyebrow, you need to draw the following line from the wing of the nose to the center point of the outer side of the pupil before that. Make sure your client is looking straight ahead.
To mark the width of the eyebrows, mark the lines perpendicular to the centerline. Focus on natural width.
Draw a line from the beginning of the opposite eyebrow to the lift line. Repeat on the other side.
Place points. The intersection of the rises and the point of intersection of the end of the eyebrow with the lower line of the width of the eyebrow.
Draw a lower border that is parallel to the last line from point 6. The intersection of the upper border of the width of the eyebrows with the line of the height of the eyebrows. The last step is to merge the tip intercept with the lower tip intercepts.
How to build an eyebrow? All you need is our brown thread!
Repeat the lines before you start sketching.
Перед построением эскиза
Follow our instructions:
Draw the first line of the beginning of the eyebrow.
Ask the client to look straight ahead and draw a line along the outer edge of the pupil. You will have an inner fold line 2 and an outer fold line 3.
Draw a line from the same point through the outer edge of the eye to define point 4.
Use a white pencil to draw the desired shape of the eyebrow!
Our thread is unique and ready for use immediately after tearing off the desired length. Build your eyebrows right and fast!
To make a perfect lip sketch in two minutes, follow our guide to help you quickly and correctly define the lines.
lines
Before you start building a sketch of the lips, you need to determine the control points and lines. The base of the entire sketch is points 8, to find them, draw a clear line number 1.
Place lines 2 clearly under the inner beginning of the nostrils. Place the top line, then purse the client's lips and vent this line on the bottom lip.
Draw lines 3 along the corners of the lips.
points
Dot 8, 9 and 10.
From the top points 9 to the top point 8, draw two lines as in the picture.
Use a pencil to draw lines 6.
From Upper point 9, draw a line to point 10, stretch the lip so that the line turns out clearly along the contour of the lips. Repeat on the other side.
General markup
From the bottom point 8, draw two lines to the bottom points 9.
From the bottom point 9, draw a line to point 10, stretch the lip so that the line is clear along the contour. Repeat on the other side
After finishing the sketch with a thread, erase unnecessary lines with a wet disk and outline the sketch with a white pencil!